

Building and painting the Junkers Desert Marauder Dune Buggy


I worked fairly quickly in between commission projects to get a couple of extra vehicles painted ready for a bit of a gaming marathon last weekend. I wanted another Dune Buggy and a second Wargames Atlantic Mauler to use as an assault vehicle. I have a rag-tag sci-fi army consisting of minis and vehicles from various different indie companies, and this Dune Buggy is from Seb Games from the Void tabletop battle game.
I run these as jeeps in Grim Dark Future One Page Rules, and as softskin technicals in Xenos Rampant.
It's quite an old-school model, being a hybrid resin and metal kit.

It's pretty straight forward and intuitive to piece together though, the only extra thing I do is to drill and pin the wheel pieces to the chassis, otherwise they'd be likely to break off under their own weight. I left the gunner and the roll cage separate for most of the painting.

To help with holding the model while painting, I drilled and pinned it through the chassis base with 2mm brass rod which I've skewered into a big cork - I'll also use this brass rod to secure it to the base.
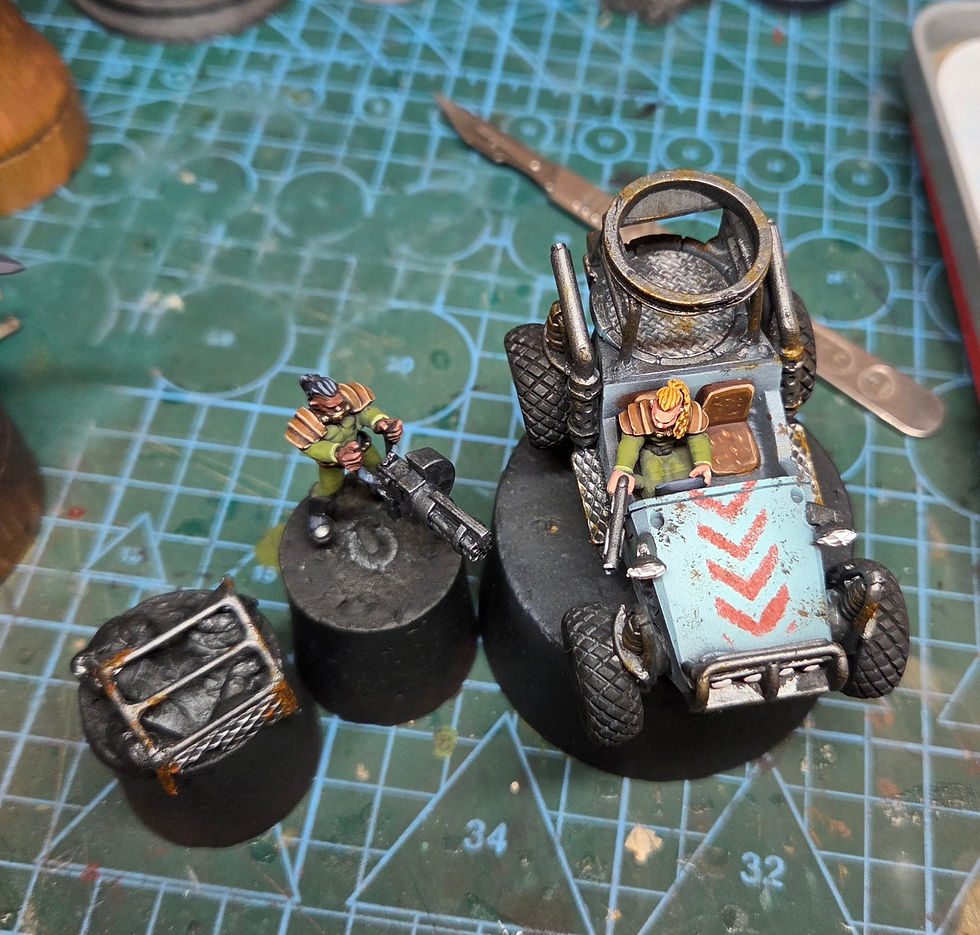
The way I painted it is to prime the model black, then zenithal white, but only concentrating on the main chassis. I then airbrushed a base coat of Miniature Paints Light Turquoise on the chassis, which is a very close approximation of the 'duck egg' colour used on a lot of engines and industrial facilities.I sprayed matte varnish over this because I would be using a stencil and wanted to ensure there was no risk of the paint lifting away.

I attached a self-adhesive Steel Harpy chevron stencil to the hood and then stippled on the pattern in Pro Acryl Burnt Red with a piece of sponge (paints used throughout are Pro Acryl unless otherwise stated).

I then blocked in all the wheels, suspension springs and metal areas in black, then painted the metals in Dark Silver, and picked out the headlamps in Bold Titanium White. I added weathering by sponge stippling a few shades of brown and black, and some Dirty Down Rust effect.

Moving on to the crew, I painted their jumpsuits Dark Camo Green and their shoulder pads Mahogany. I also used Mahogany as the base colour for the gunner's skin. I used Shadow Flesh for the driver's skin. The jumpsuits were highlighted up by adding Dark Yellow Green into the base colour, with ivory added for the edges of the cuffs. The driver's skin was highlighted by adding Tan Flesh and Ivory, the hair was simply Yellow Brown with a Brown wash to shade it. The gunner's skin was highlighted by adding Shadow Flesh to the base colour, with final highlights including Olive Flesh.
I fully assembled the model at this point and gave the whole vehicle a coat of gloss varnish. Once this was dry I painted on enamel Streaking Grime - normally for vehicles I'd airbrush the whole thing, but I didn't want any on the crew or interior. Before this dried, I used a lint free cloth to wipe away the excess, leaving the majority of the grime effect in the recesses.I reapplied white to the headlamps, and then airbrushed white then yellow Liquitex inks for the OSL effect. Then the whole model was sprayed with matte varnish.

For the base, I used a 90mm round MDF base from Pendraken and layered thin cork sheet over this. I also added a small resin skull and bone pile from Fenris Games, and rubble in the form of cork grit. This was primed once the glue was dry, and then painted with GW Martian Iron Earth and Martian Iron Crust for a rough, cracked ground look.To firmly fix the buggy to the base, I drilled into the cork with a 2mm bit and skewered the superglued brass rod in the base of the buggy into this, with superglue added to the bottoms of the wheels too. I could then finish the weathering process by dusting on Mig Ammo red rust pigment powder, finally sealing with another coat of matte varnish.


I really like how the whole army hangs together, and I think I have sufficient vehicles now, with the two buggies, two Mauler APCs and three walkers. The next addition might be some of the Wargames Atlantic Damned infantry, or another box of Stargrave Scavengers. Talking of Stargrave, I'm keeping my eye out for the newest expansion in November, as that will include rules for including vehicles, so I may have a third use for these buggies!


